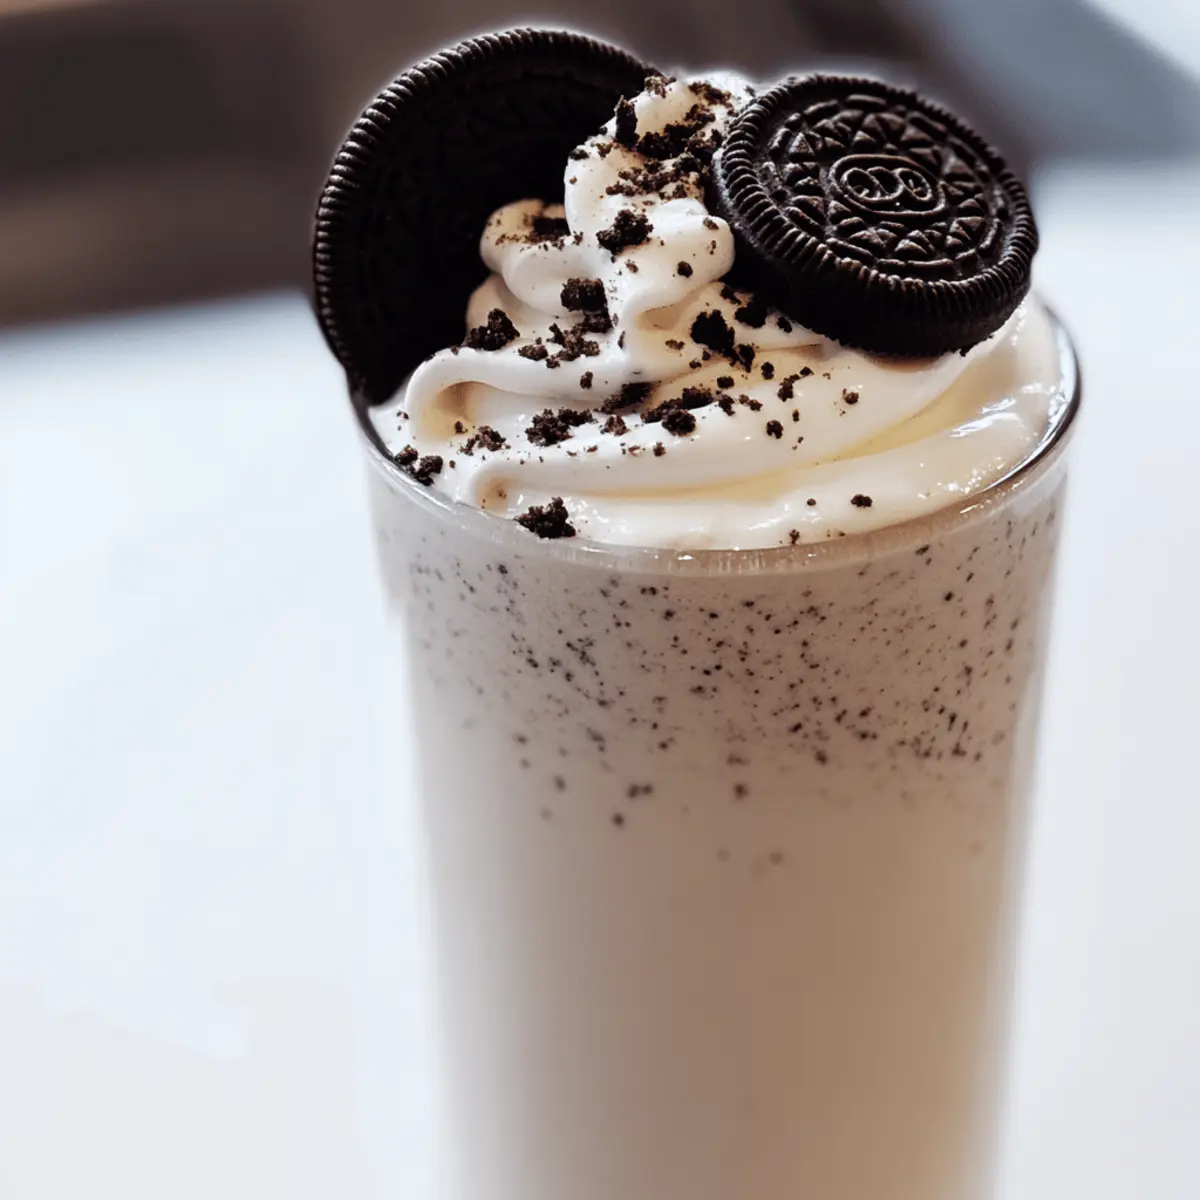
The other day, while chatting with friends, we reminisced about those classic diner milkshakes that were the ultimate treat after a long week. I decided to recreate that nostalgic bliss at home with my Creamy Oreo Milkshake, a fabulous concoction that balances the sweetness of vanilla ice cream with the unmistakable crunch of crushed Oreos. Perfect for those sunny afternoons or a fun family movie night, this recipe is not only quick to whip up but also endlessly customizable. You can easily make it gluten-free or opt for a low-fat twist! Want to know how to turn simple ingredients into a delightful dessert? Dive in and let’s blend some magic together!

Why Choose This Oreo Milkshake Recipe?
Decadent Flavor: The rich combination of vanilla ice cream and crushed Oreos creates a flavor explosion that brings joy with every sip.
Customizable Delight: Easily adapt this milkshake to suit your taste buds! Add chocolate chips, or experiment with toppings like mini marshmallows or caramel drizzle.
Health-Conscious Options: Enjoy it guilt-free! Substitute gluten-free Oreos or low-fat ice cream without sacrificing the creamy texture.
Quick & Easy: This milkshake comes together in minutes—perfect for those spontaneous dessert cravings or entertaining guests.
Nostalgic Vibes: Recreate the charm of classic diner milkshakes right at home, making it a perfect treat for family movie nights or warm afternoons. Want more delicious treats? Check out my Oreo Milkshake Bliss or try the comforting Creamy Crack Chicken Gnocchi for dinner!
Creamy Oreo Milkshake Ingredients
• Get ready to blend some deliciousness!
For the Milkshake
- Vanilla Ice Cream – Provides creaminess and sweetness; feel free to swap for low-fat ice cream for a lighter treat.
- Milk – Adjusts the thickness of the milkshake; almond, oat, or soy milk are great lactose-free alternatives.
- Oreo Cookies – The main flavor component, crushed for texture; gluten-free Oreos work perfectly for a gluten-free variant.
- Chocolate Chips – Adds an extra chocolatey crunch; semi-sweet is ideal, but you can replace or omit them if preferred.
For the Topping
- Whipped Cream – A fluffy topping that adds an airy touch; non-dairy whipped toppings make it a vegan-friendly choice.
Enjoy crafting your Creamy Oreo Milkshake—it’s just a few ingredients away!
Step‑by‑Step Instructions for Creamy Oreo Milkshake
Step 1: Gather Your Ingredients
Begin by collecting all your ingredients: rich vanilla ice cream, milk of your choice, crushed Oreo cookies, chocolate chips, and fluffy whipped cream. Ensure you have a blender ready and a couple of chilled glasses for serving. This setup will make the process seamless and enjoyable as you create your delicious Creamy Oreo Milkshake.
Step 2: Blend the Base
In your blender, combine 2-3 cups of creamy vanilla ice cream with about ⅓ cup of milk, followed by 8 crushed Oreos. Blend on medium speed for about 30-45 seconds, or until you achieve a smooth, thick consistency. Keep an eye on the blending process; you want the mixture to be velvety without any large Oreo chunks remaining.
Step 3: Adjust Consistency if Needed
If the milkshake appears too thick to your liking, simply add milk one tablespoon at a time, blending briefly between additions. This step usually takes just an extra 1-2 minutes. Aim for a smooth and drinkable texture that still maintains richness, perfect for your Creamy Oreo Milkshake indulgence.
Step 4: Incorporate Chocolate Chips
For an added layer of deliciousness, toss in a handful of chocolate chips. Pulse the blender briefly for just about 10-15 seconds to mix them in while keeping some chips intact for texture. This will elevate the creamy chocolate flavor of your milkshake, making it even more delightful.
Step 5: Serve and Garnish
Pour your luxurious milkshake into the chilled glasses, filling them to the brim. Top generously with a dollop of whipped cream for that classic milkshake appearance, and sprinkle additional crushed Oreos over the top for a delightful crunch. Your irresistible Creamy Oreo Milkshake is now ready to be enjoyed!

Creamy Oreo Milkshake Variations
Customize your milkshake to suit your cravings and dietary needs! Discover the delightful world of flavors that await.
- Dairy-Free: Use coconut or almond milk instead of regular milk and swap vanilla ice cream for a non-dairy alternative for a vegan treat. The luscious flavors remain intact, and you’ll never miss the dairy!
- Gluten-Free: Opt for gluten-free Oreos to keep this milkshake friendly for gluten-sensitive friends. Enjoy the same creamy texture and satisfying crunch without worry!
- Low-Fat Twist: Substitute low-fat vanilla ice cream and use skim or almond milk. This health-conscious option lets you indulge without straying too far from your goals!
- Flavor Boost: Add a splash of coffee or espresso for a mocha twist—perfect for coffee lovers looking to elevate their milkshake experience. You’ll feel the energy kick with each sip!
- Texture Additions: Toss in some mini marshmallows or crushed graham crackers for an exciting new texture. This added crunch brings an unexpected surprise to your familiar treat!
- Nutty Fun: Mix in a tablespoon of almond or peanut butter for a nutty flavor that pairs wonderfully with the sweetness of the Oreo. It’ll create a creamy, indulgent experience that’s hard to resist!
- Seasonal Spice: Experiment with a dash of pumpkin pie spice or cinnamon in the milkshake during fall to infuse a cozy seasonal essence. This twist can turn your milkshake into a festive hit!
- Chocolate Lovers’ Delight: Rethink chocolate by using chocolate ice cream in place of vanilla for an overdose of chocolate goodness. It’s blissful, especially if you’re a true chocoholic!
Whether it’s a movie night or a sunny afternoon, these variations will take your Creamy Oreo Milkshake to the next level. For more delicious recipes, don’t miss my Cajun Chicken Pasta or add a delightful touch to dinner with Creamy Crack Chicken Gnocchi!
What to Serve with Creamy Oreo Milkshake Delight
Treat yourself to a delightful dessert experience as you explore delicious pairings that elevate your creamy indulgence.
-
Chocolate Chip Cookies: The classic duo! Soft, warm chocolate chip cookies create a perfect texture contrast to the cold, creamy milkshake.
-
Mini Cheesecakes: Their rich and creamy flavor complements the Oreo sweetness, offering a delightful variety on your dessert plate.
-
Fresh Fruit Salad: Bright, juicy fruits like strawberries and bananas add a refreshing note, balancing the rich flavors of your milkshake.
-
Salted Caramel Brownies: The fudgy texture and sweet-salty contrast enhance each sip of your creamy Oreo milkshake—pure bliss!
-
Peanut Butter Cup Brownies: Indulge in a decadent combo; the peanut butter and chocolate flavors will blend beautifully with the Oreo milkshake.
-
Vanilla Bean Cupcakes: Light and fluffy, these cupcakes are a delightful touch that invites you to enjoy the creamy treat for dessert.
-
Iced Coffee: For a grown-up twist, sip on a chilled iced coffee alongside your milkshake, complementing the sweetness and richness.
-
Chocolate Cakies: Soft and chewy, these chocolate-filled cookies create a dreamy texture pairing, making dessert even more pleasurable.
-
Milk Chocolate Dipped Pretzels: Their salty crunch perfectly balances the creamy sweetness, adding an exciting flavor dimension to the meal.
Expert Tips for the Best Creamy Oreo Milkshake
-
Ice Cream Choice: Use high-quality vanilla ice cream for the best flavor. A richer ice cream will enhance the creaminess of your Creamy Oreo Milkshake.
-
Milk Options: Choose milk according to your dietary needs; almond or oat milk works well for lactose-free options without compromising taste.
-
Oreo Crushing: Crush your Oreos into smaller pieces before blending for a better texture; larger chunks might not mix well, resulting in clumps.
-
Chill Your Glasses: For the best presentation, chill your glasses in the freezer for 10-15 minutes before serving to keep your milkshake cold longer.
-
Blend Timing: Don’t over-blend! Blend just until the ingredients are combined; over-blending can make the milkshake too runny.
-
Experiment: Feel free to try different mix-ins or toppings like caramel drizzle or peanut butter for a unique twist on the classic creamy delight!
Make Ahead Options
These Creamy Oreo Milkshakes are perfect for busy home cooks wanting to save time! You can prep the base of the milkshake—vanilla ice cream, milk, and crushed Oreos—up to 24 hours in advance. Simply blend the ice cream with milk and crushed Oreos, then refrigerate the mixture in an airtight container. To maintain the milkshake’s creamy texture, it’s best to blend it fresh right before serving. When you’re ready to indulge, just add any chocolate chips, blend briefly to mix, and pour into chilled glasses topped with whipped cream. This simple prep method gives you a delightful treat with minimal effort, making family movie nights a breeze!
How to Store and Freeze Creamy Oreo Milkshake
Fridge: Store any leftovers in a sealed container for up to 2 days. Stir well before consuming, as the milkshake may separate over time.
Freezer: If you want to save your Creamy Oreo Milkshake for later, pour it into an airtight jar and freeze for up to 1 month. Thaw in the fridge for about an hour before serving, and stir well to restore texture.
Reheating: Be aware that milkshakes don’t really “reheat.” Instead, let the frozen milkshake sit at room temperature for about 10 minutes to soften before enjoying!
Tip: If making a large batch, consider portioning it into individual servings for easier thawing later on.

Creamy Oreo Milkshake Delight Recipe FAQs
What kind of Oreos should I use for the milkshake?
Absolutely! You can use regular Oreos for a classic flavor or opt for gluten-free Oreos if you need a gluten-free version. Just make sure to crush them well to distribute their flavor throughout your milkshake.
How should I store my leftover milkshake?
To store your Creamy Oreo Milkshake, place any leftovers in a sealed container in the fridge for up to 2 days. If you notice separation, just give it a quick stir before enjoying. For longer storage, you can pour the milkshake into an airtight jar and freeze it for up to 1 month.
Can I freeze the milkshake? If so, how?
Yes! To freeze your Creamy Oreo Milkshake, transfer it into an airtight jar. Make sure to leave some space at the top for expansion. When you’re ready to enjoy it again, let it thaw in the refrigerator for about an hour. Stir well to restore its smooth texture before serving.
What can I do if my milkshake is too thick?
Very! If you find that your milkshake is too thick for your liking, simply add milk one tablespoon at a time while blending. Blend for a few seconds after each addition until you achieve your desired consistency. Aim for a thick yet drinkable texture.
Is this milkshake suitable for anyone with allergies?
Definitely! To accommodate dietary needs, you can substitute the milk with almond or soy milk for lactose intolerance, and use dairy-free whipped topping for a vegan option. Just be cautious with the Oreos if you’re managing specific allergies, and choose gluten-free versions where necessary.

Indulge in a Creamy Oreo Milkshake Bliss at Home
Ingredients
Equipment
Method
- Gather your ingredients: vanilla ice cream, milk, crushed Oreos, chocolate chips, and whipped cream.
- In a blender, combine 2-3 cups of ice cream, ⅓ cup of milk, and 8 crushed Oreos. Blend until smooth.
- Adjust the thickness by adding milk one tablespoon at a time until desired consistency is reached.
- Add chocolate chips and pulse briefly to incorporate while keeping some intact.
- Pour into chilled glasses, top with whipped cream, and garnish with crushed Oreos.

Leave a Reply