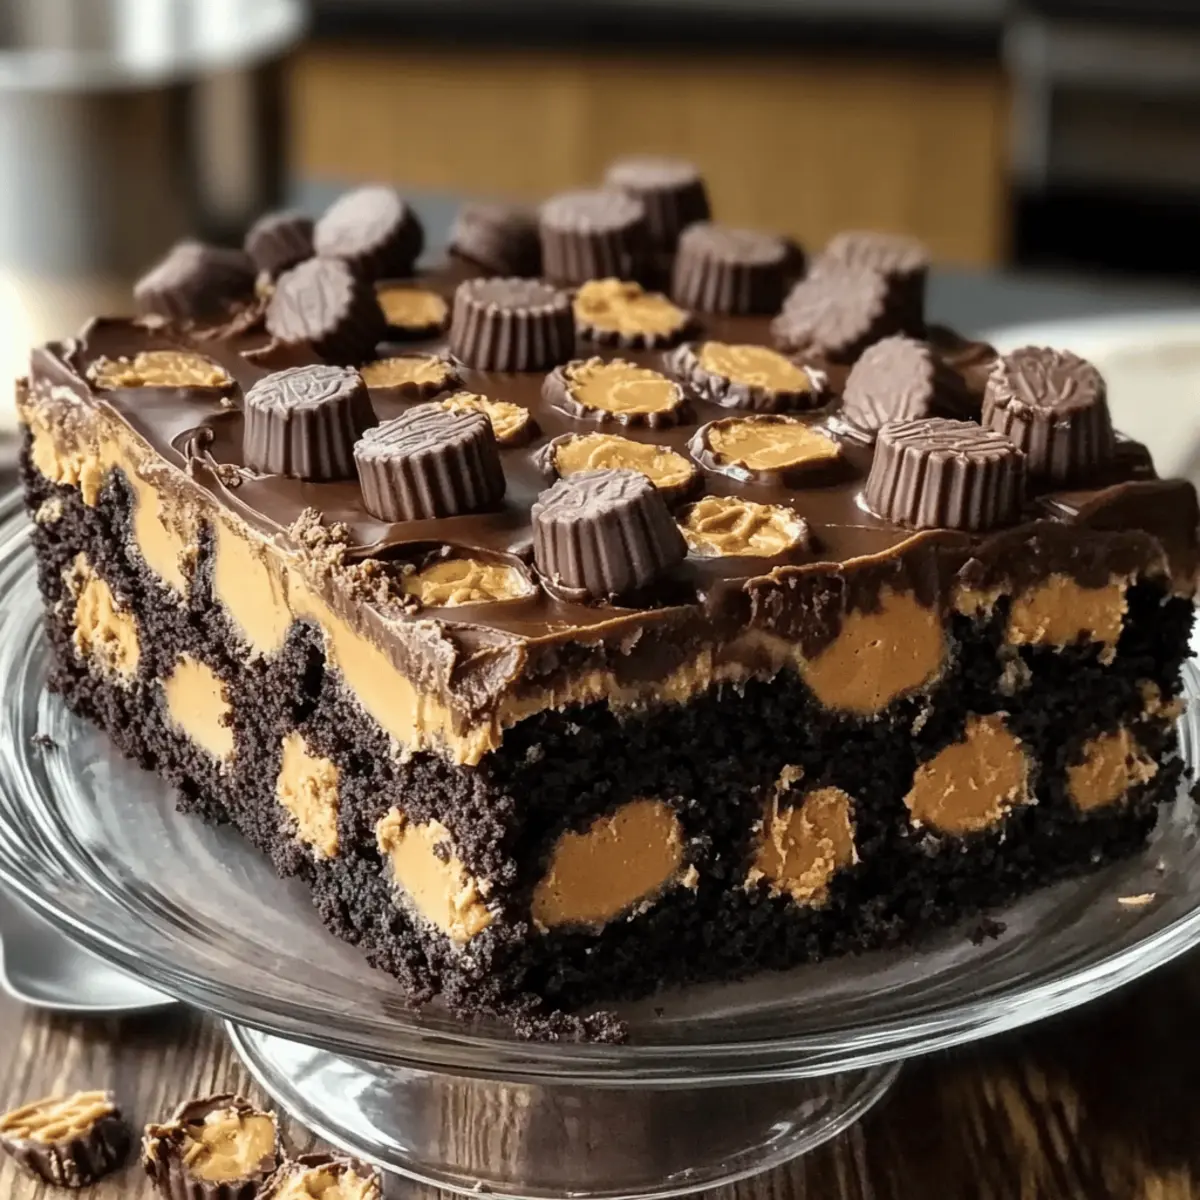
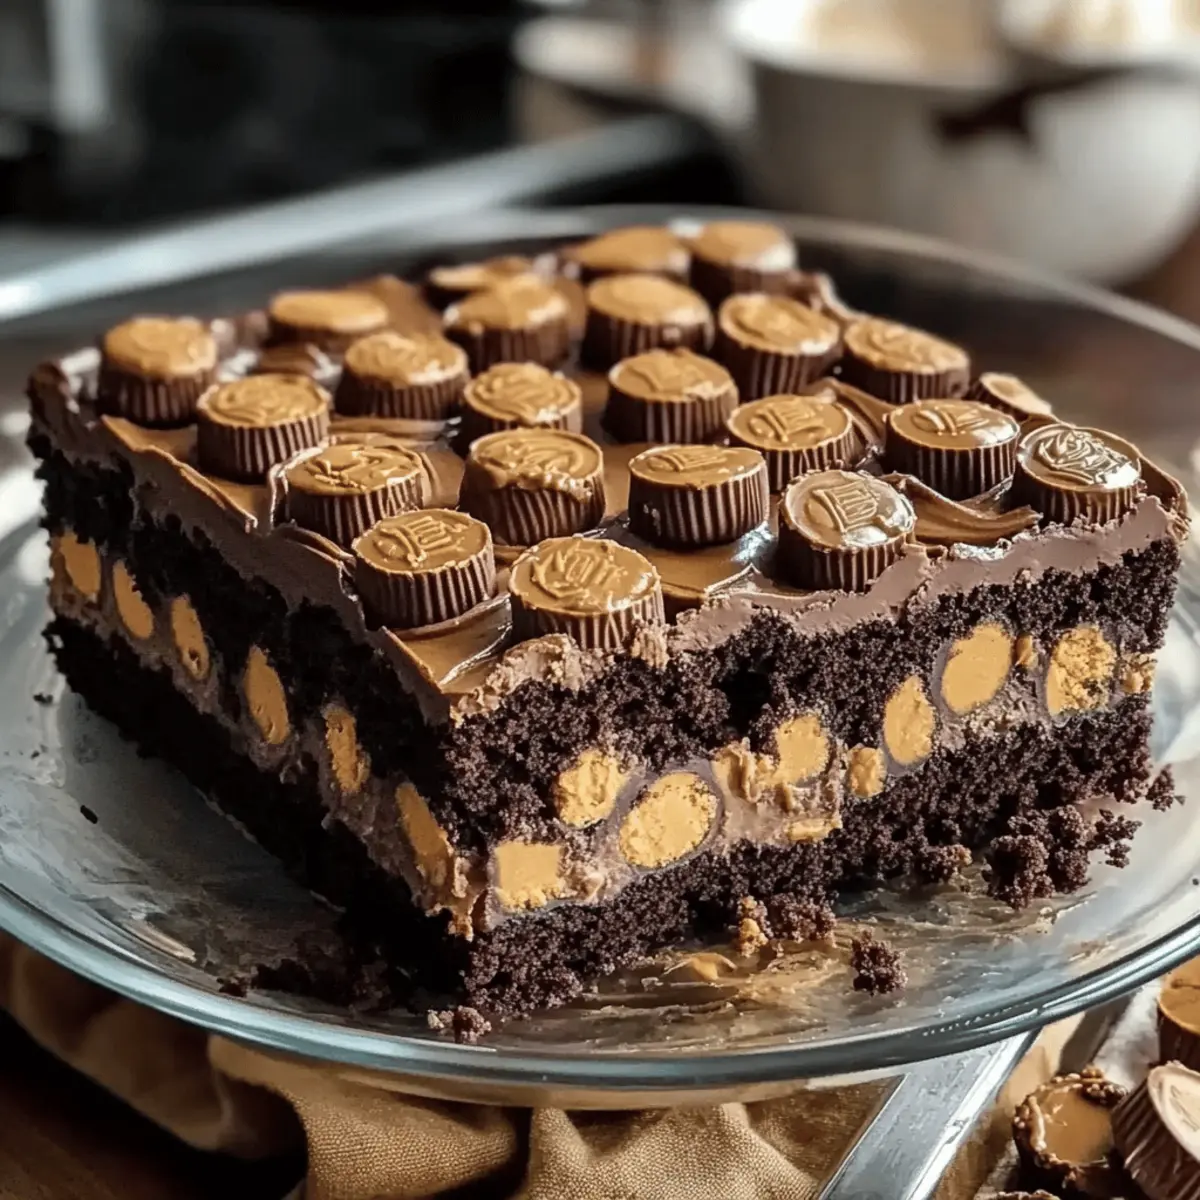
As I sifted through cherished family recipes, a wave of nostalgia washed over me when I stumbled upon the beloved Peanut Butter Earthquake Cake. This dessert is more than just a cake; it’s a time capsule of laughter-filled gatherings and late-night snacks shared with loved ones. With its rich, fudgy base and delightful surprise of melted Reese’s Peanut Butter Cups, this easy-to-make treat brings smiles to faces of all ages. You’re in for a real delight, as it offers the perfect combination of indulgence and simplicity—ideal for a weekend gathering or a cozy night on the couch. Ready to create some sweet memories of your own?

Why Will You Adore This Cake?
Nostalgic memories flood back with each bite of this delectable Peanut Butter Earthquake Cake, making it a perfect choice for family gatherings. Simplicity shines through; it’s easy to whip up, requiring just a few ingredients. Irresistible flavors abound as the rich chocolate cake mingles with creamy peanut butter and gooey Reese’s, delighting everyone at the table. Versatile enough for any occasion, whether it’s a birthday celebration or a sweet treat on a quiet night in. Impress your guests and treat your family to a dessert they’ll reminisce about long after the plates are cleared. Try it today and uncover a sweet slice of nostalgia!
Peanut Butter Earthquake Cake Ingredients
For the Cake Base
• Chocolate Cake Mix – A dark chocolate cake mix offers a richer depth of flavor.
• Water – Just use tap water; it helps keep the batter moist.
• Vegetable Oil – Adds moisture and tenderness; melted coconut oil can be a tasty alternative.
• Eggs – Acts as a binder; flaxseed meal can be swapped for a vegan option.
For the Peanut Butter Filling
• Creamy Peanut Butter – The star of the show! Almond butter works if you need a nut-free version.
• Cream Cheese (softened) – Provides a rich creaminess; mascarpone can be used for a different texture.
• Unsalted Butter (melted) – Enhances flavor and moisture; margarine is a suitable substitute.
• Powdered Sugar – For sweetness and a smooth filling; granulated sugar can be used but will be grainier.
• Vanilla Extract – Elevates the flavor profile; almond extract offers a delightful twist.
For Assembly
• Reese’s Peanut Butter Cups (chopped) – These treats add bursts of sweetness throughout the cake; any chocolate candy can be a scrumptious swap.
• Sweetened Condensed Milk – Drizzled for extra moisture and a luscious texture.
• Chocolate Chips – Sprinkled on top for a decadent finishing touch.
Explore these ingredients and prepare to dive into a wonderfully indulgent Peanut Butter Earthquake Cake that’s sure to please and create happy memories!
Step‑by‑Step Instructions for Peanut Butter Earthquake Cake
Step 1: Preheat the Oven
Begin by preheating your oven to 350°F (175°C), and while it warms up, grease a 9×13-inch baking dish to ensure easy removal of your Peanut Butter Earthquake Cake later. Use a non-stick spray or softened butter for best results, as this will create a beautiful, clean edge on your delightful creation.
Step 2: Prepare the Cake Batter
In a large mixing bowl, combine the chocolate cake mix, water, vegetable oil, and eggs. Using an electric mixer, blend these ingredients on medium speed until the mixture is smooth and well combined, about 2 minutes. You’ll know it’s ready when the batter is free of lumps and has a velvety texture, perfect for the base of your Peanut Butter Earthquake Cake.
Step 3: Make the Peanut Butter Mixture
In a separate bowl, mix together the creamy peanut butter, softened cream cheese, melted butter, powdered sugar, and vanilla extract. Use a hand mixer to blend until the mixture is creamy and free of lumps, about 1-2 minutes. This enticing peanut butter filling will add a rich, gooey center to your cake, enhancing its decadent flavor.
Step 4: Assemble the First Layer
Pour half of the chocolate cake batter into your greased baking dish, spreading it evenly with a spatula. Once distributed, drizzle a layer of sweetened condensed milk evenly over the batter to add an extra depth of sweetness and moisture. This step is crucial for achieving that signature earthquake effect in your Peanut Butter Earthquake Cake.
Step 5: Add the Peanut Butter Filling
Carefully drop spoonfuls of the creamy peanut butter mixture over the chocolate batter, ensuring an even distribution. With a knife, gently swirl the peanut butter filling into the batter, creating a marbled effect without fully blending the layers. This will allow those delightful peanut buttery pockets to shine through after baking.
Step 6: Top with Remaining Batter
Now, pour the remaining chocolate cake batter over the peanut butter layer, distributing it evenly. Once covered, sprinkle a generous amount of chocolate chips on top. This not only adds a beautiful touch but also enriches the flavor profile, promising a chocolaty surprise in every bite of your Peanut Butter Earthquake Cake.
Step 7: Bake to Perfection
Place the baking dish in your preheated oven and bake for 35-40 minutes. To check for doneness, insert a toothpick into the center; it should come out with moist crumbs, indicating that your cake is ready. The top will look slightly cracked, signaling the perfect “earthquake” texture that makes this dessert so irresistible.
Step 8: Cool and Serve
Once baked, remove the Peanut Butter Earthquake Cake from the oven and let it cool in the pan for about 10-15 minutes. This resting period allows the cake to set properly and makes slicing easier. Dust the top with powdered sugar for an elegant finish, and serve warm to enjoy the gooey decadence of this family favorite.

How to Store and Freeze Peanut Butter Earthquake Cake
Room Temperature: Store the cake in an airtight container at room temperature for up to 3 days to maintain its deliciously gooey texture.
Fridge: If you prefer a colder dessert, keep the cake in the refrigerator for up to a week. Make sure to wrap it well to prevent it from drying out.
Freezer: Freeze slices in a sturdy, airtight container for up to 2 months. Allow thawing in the fridge overnight before enjoying to retain the cake’s moistness.
Reheating: For a warm, indulgent experience, reheat individual slices in the microwave for 10-15 seconds before serving. Enjoy your Peanut Butter Earthquake Cake, warm and gooey!
Peanut Butter Earthquake Cake Variations
Feel free to get creative with this Peanut Butter Earthquake Cake and tailor it to your taste preferences!
-
Crunchy Twist: Use crunchy peanut butter instead of creamy for added texture and delightful surprise with every bite. The variation brings an exciting crunch to the soft, gooey cake.
-
Alternative Cake Mix: Switch things up by using a different flavor of cake mix, such as vanilla or red velvet, to surprise your senses. Each mix opens a world of new flavor possibilities!
-
Nut-Free Option: Swap creamy peanut butter with a delicious almond butter for a nut-free alternative that still packs a punch of flavor. Your friends with nut allergies will be grateful!
-
Flavorful Frosting: Experiment by adding a drizzle of chocolate ganache on top right before serving for an indulgent, silky finish. It elevates this cake to a whole new level of chocolatey goodness.
-
Sweet Heat: Mix in a pinch of cayenne or chili powder to the peanut butter filling for a surprisingly delightful kick. This variation balances the sweetness with a subtle heat that will keep everyone guessing.
-
Chocolate Swirls: Instead of just peanut butter, create chocolate peanut butter swirls by mixing your favorite chocolate spread into the filling. A chocolate overload that no one can resist!
-
Heavenly Layering: Add a layer of chopped caramel candies or butterscotch chips in the middle for an extra layer of gooey sweetness. These small bursts will melt into a heavenly surprise.
Looking for other delightful recipes to go with your dessert? Consider serving alongside warm slices of our Garlic Butter Steak for a savory contrast or delicious Blueberry Buttermilk Pancake for a sweet brunch treat.
Expert Tips for Peanut Butter Earthquake Cake
-
Mix It Gently: Be careful not to overmix the cake batter; doing so can lead to a tough texture, defeating the soft goodness of this Peanut Butter Earthquake Cake.
-
Softened Cream Cheese: Ensure your cream cheese is softened for easy blending. This prevents lumps that can disrupt the luscious peanut butter filling.
-
Cool Before Slicing: Allow the cake to cool in the pan for about 10-15 minutes before cutting. This helps in achieving cleaner, more appealing slices of your delicious cake.
-
Layer Wisely: When drizzling sweetened condensed milk and adding the peanut butter filling, distribute them evenly to ensure that every bite of the cake is packed with delightful surprises.
-
Check for Doneness: Make sure to check the cake with a toothpick about 35 minutes in; it’s ready when moist crumbs cling to the toothpick, creating that perfect gooey texture.
What to Serve with Reese’s Peanut Butter Earthquake Cake
Elevate your dessert experience by pairing this indulgent cake with delightful accompaniments that enhance its flavors and textures.
-
Vanilla Ice Cream: The creamy, cool contrast of vanilla ice cream perfectly complements the warm fudgy cake, creating a heavenly combination.
-
Whipped Cream: A dollop of whipped cream adds lightness and creaminess, balancing the rich, dense nature of the Peanut Butter Earthquake Cake.
-
Fresh Berries: Juicy strawberries or raspberries not only add a fruity freshness but also a splash of color to your dessert plate.
-
Caramel Sauce: Drizzling warm caramel over slices brings an additional layer of sweetness and a delightful stickiness that pairs beautifully.
-
Chocolate Sauce: For chocolate lovers, a rich chocolate drizzle intensifies the fudge-like experience of the cake, making each bite sinfully delicious.
-
Crispy Bacon Bits: Surprising but oh-so-good! The salty crunch of bacon bits complements the sweetness in an unexpected yet delightful way.
-
Cold Brew Coffee: Sipping on a chilled cup of coffee creates a lovely contrast to the cake’s sweetness, enhancing its rich flavors.
-
Hazelnut Cream Liqueur: For adults, serving the cake with a glass of hazelnut cream liqueur can add depth and a nutty richness to the dessert experience.
Make Ahead Options
This Peanut Butter Earthquake Cake is perfect for busy home cooks looking to save time during the week! You can prepare the cake batter and the peanut butter filling up to 24 hours in advance; simply combine the components as directed, but stop before baking. Cover each bowl with plastic wrap and refrigerate to maintain the vibrant flavors and prevent drying out. On the day you want to enjoy the cake, pour half of the batter and proceed with the sweetened condensed milk and peanut butter filling, then top with the rest of the batter before baking. This way, you’ll have a delicious, homemade dessert ready with minimal last-minute effort, just as comforting and gooey as if it were made fresh!

Peanut Butter Earthquake Cake Recipe FAQs
How do I choose the right chocolate cake mix?
Absolutely! For the best flavor and richness, I recommend using a dark chocolate cake mix. The deeper cocoa notes will enhance the fudginess of your Peanut Butter Earthquake Cake, making it even more delightful!
What’s the best way to store leftover Peanut Butter Earthquake Cake?
You can store leftover cake in an airtight container at room temperature for up to 3 days. If you prefer to extend its shelf life, you can refrigerate it for up to a week. Just remember to wrap it well to prevent any drying out!
Can I freeze slices of Peanut Butter Earthquake Cake?
Yes, you can absolutely freeze it! To do so, place slices in a sturdy, airtight container, ensuring you separate layers with parchment paper to avoid sticking. It can be frozen for up to 2 months. When ready to enjoy, thaw it overnight in the refrigerator to maintain that delicious moistness.
What if my cake doesn’t turn out gooey in the center?
If your Peanut Butter Earthquake Cake isn’t gooey enough, it might need a bit more baking time. Make sure you’re checking for doneness with a toothpick around the 35-minute mark; it should come out with moist crumbs, indicating it’s perfect. If it’s not set yet, bake for an additional 3-5 minutes and keep a close eye on it.
Are there any dietary considerations with this recipe?
There are some tasty alternatives you can explore! You can substitute the eggs with flaxseed meal mixed with water for a vegan version. Additionally, using almond butter instead of creamy peanut butter will make the recipe nut-free. Just be cautious if serving to guests with allergies, and always label your dessert!
Can I use different candies in my Peanut Butter Earthquake Cake?
The more the merrier! While Reese’s Peanut Butter Cups are a fabulous choice, you can substitute them with any chocolate candy of your liking, such as Snickers or Milky Way for a yummy twist. Enjoy experimenting for a personalized sweet surprise!

Decadent Peanut Butter Earthquake Cake That Wow’s Every Bite
Ingredients
Equipment
Method
- Preheat your oven to 350°F (175°C) and grease a 9x13-inch baking dish.
- In a large mixing bowl, combine the chocolate cake mix, water, vegetable oil, and eggs. Blend until smooth, about 2 minutes.
- In a separate bowl, mix the creamy peanut butter, softened cream cheese, melted butter, powdered sugar, and vanilla until creamy.
- Pour half of the chocolate cake batter into the greased baking dish and drizzle a layer of sweetened condensed milk.
- Drop spoonfuls of the peanut butter mixture over the chocolate batter and swirl gently without fully blending.
- Pour the remaining chocolate cake batter over the peanut butter layer and sprinkle chocolate chips on top.
- Bake for 35-40 minutes; check for doneness with a toothpick. The center should come out with moist crumbs.
- Allow the cake to cool in the pan for 10-15 minutes before slicing. Dust with powdered sugar before serving.

Leave a Reply